To start with, always use good-quality twine, without thick and thin spots, keep knotters clean using compressed air and blow gun, and lubricate them with No. 2 grade lithium grease immediately after you are done for the day while they are still “warm.”
See the following for more specific knotter symptoms and adjustments.
Twine failure at base of the knot
This is the number one most common problem with knotters. When this happens, replace poor or weak twine and decrease baling tension or remove hay wedges to decrease density. Loosen twine holder spring bolt; turn and test it.
Bow Knot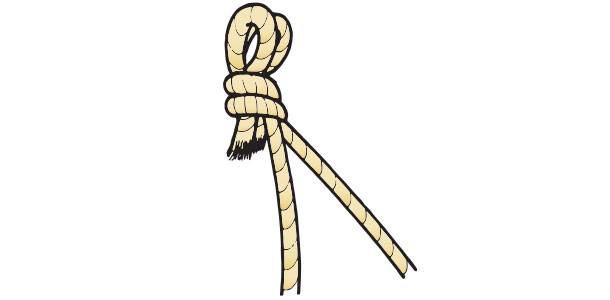
Knotters are tying bow knots
To handle this one, increase billhook cam spring to a length of 11/16 of an inch. Sharpen the twine knife and tighten the twine holder spring bolt; turn and test it. Increasing the baling tension may also help. (See Figure 1)
Knots are hanging on billhooks
Sharpen or replace the twine knife. Tighten the twine holder spring bolt and turn. Decrease the billhook cam tension by loosening the spring nut; turn and test it. It might be insufficient stripper throw.
If so, re-adjust as needed to provide ½-inch to ⅝-inch clearance between the stripper arm flange and billhook at the end of stripper arm travel.
Knot tied on twine held in knotter, but not in twine from needle (No. 2 twine miss)
In this case, replace a broken twine finger return spring or inspect the hay dogs and replace broken or missing parts. Increase twine tension at the twine box.
Add hay wedges if baling springy material. Check and adjust needle-to-plunger timing.
Knot tied in needle twine, but not in twine held in knotter (No. 1 twine miss)
Tighten the twine holder spring bolt; turn and test it. Decrease baling tension or remove hay wedges to decrease density.
Decrease twine tension at the twine box. Replace poor or weak twine.
Twine slips out of needle eye, three twines in the knot or twine is out of the needle eye and adjacent bales are tied together
Increase twine tension at the twine box.
Twine breaks within 2 inches of knot
Check for sharp edges or groove on throat of knife arm.
Twine breaks more than 2 inches from knot
Check for sharp edges, projection or loose hardware in bale chamber.
No loop in either twine
Indicates extreme tension on the twine holder; re-adjust it. The twine holder may be too loose; tighten, turn and test it. Remove rough edges on twine holder or disc.
Knotter shear bolts shearing
Clean chaff and debris from knotters. Check knotter brake adjustment. Adjust the needle yoke rod to prevent it from hitting the bottom of the bale case. Check knotter timing. Make sure the correct shear bolt is used.
Both needles break
Needle safety latch may be frozen or the linkage out of adjustment or inoperable. The baler may be out of time.
One needle breaks
Check plunger needle slots for debris buildup or for something lodged in needle slot. FG
Curtis Hoffman is crop packaging products marketing manager with New Holland Agriculture