Essential scouting tools to take with you into the field include a digging tool, pocketknife and a 25-foot tape measure, Lang says. It is also often helpful to bring some flags to mark problem areas and something for taking notes, such as your smartphone, tablet or notebook.
Other useful equipment, depending on the time of the growing season, includes a soil thermometer to zero in on first planting of corn, a hand lens (10x to 30x) for taking a closer look at what is going on, and a sweep net with a 15-inch-diameter net.
Start by looking at the overall field from a higher vantage point if possible, advises Lang. Look for irregularities in the field in patterns, colors and height. Search for patterns in the field from equipment, tile drainage, etc. Look for in-plant development associated with soil types, natural drainage, compaction and residue.
Lang says to walk in the field at least 100 feet to get away from border effects, then check about five to six locations in a field per scouting effort. Sometimes it is advisable to walk a “W” or other pattern in the field, but Lang says the most important thing is to look for areas where things look different and then investigate it.
“Always have along that digger tool,” he says. “Visible abnormal plant development aboveground could be caused by any number of problems below ground, including disease, insects, sidewall compaction, herbicide injury or other factors. Dig up the plants to see what is going on.”
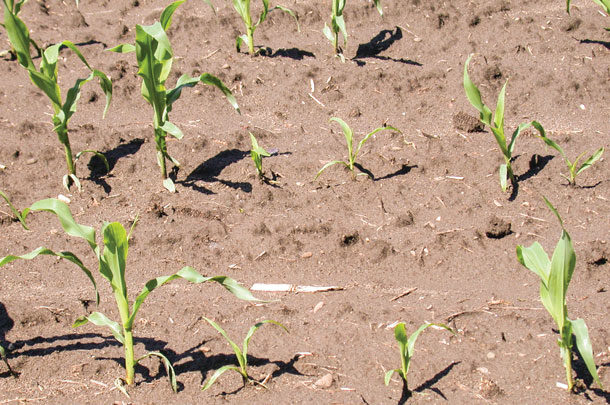
Corn
The best time to do a stand count on your corn is around stage V3. (The V3 stage is reached at 10 to 20 days after emergence or around 350 growing-degree units.) “At V3, if there are issues with poor plant development or gaps in the rows, the evidence of what is going on usually still exists,” he says. For example, if an insect prevented germination, the seed will likely not be completely decomposed, and you should be able to see the damage.
Look at the entire plant, including the roots, the underside of the leaves and the whorl where the stem is forming. Check for pests, weeds and disease, both aboveground and below ground.
Check for:
- Seed depth, space and uniformity of emergence
- Soil conditions: sidewall compaction, drainage, soil texture
- Residue management
- Disease symptoms (Check mesocotyl, seedling roots)
- Herbicide injury
- Insect damage:
o Below ground, check for grubs, wireworms, seed corn maggot
o Aboveground, check for cutworms and other pests
- Fertilizer injury
- Take into account recent weather.
Problem prevention includes checking your planter setup at the start. “As you begin planting each field, plant about 100 feet, get off the tractor and check,” Lang says. Is your seed depth 1.75 to 2 inches? Are the seeds evenly spaced? Is there smearing from sidewalls?
Alfalfa
Perform an early check while planting to make sure you are planting about 1/4- to 1/2-inch deep, or up to 3/4-inch deep on light soils. It is absolutely critical to ensure there is good seed-to-soil contact, whether using a cultipacker or press wheels.
Typical seeding rates of 12 to 15 pounds per acre provide about 60 to 75 seeds per square foot, which usually results in a successful establishment of about 30 plants per square foot by fall.
In fields with a history of heavy weed pressure, use a pre-plant incorporated herbicide such as Eptam or Treflan, says Lang. If not using a pre-plant herbicide, scout during emergence for possible need of a post-herbicide application for grass or broadleaf control.
Scouting your alfalfa throughout the entire growing season is a good idea, Lang says, especially for insect control.
As with corn scouting, look over the entire field first to look for spots that are irregular. In March and April, watch for problems from overwintering, including plants injured from extended saturated soils and ice sheets. Dig to check crown health. Look for crown rot and asymmetrical growth at greenup.
Potato leafhopper is often a problem for second- and third-crop alfalfa, but also be sure to scout for them in alfalfa under the oat nurse crop before boot stage, when most insecticides can still be safely applied to an oat-alfalfa crop.
Some research shows benefits of using a foliar fungicide on alfalfa, more so for first crop than other crops during the season. If considering this option, plan for foliar fungicide application at about 8 to 10 inches of canopy height during first-crop growth. If fungicide is desired on second-, third- or fourth-crop alfalfa, apply at about a 5-inch canopy height to stay within the pre-harvest interval of your planned harvest schedule.
As each new-crop growth begins throughout the growing season, scout for insects and consult your local university extension office to know what to watch for in your area, Lang says.
Aphanomyces root rot or common root rot is a problem in many areas. He explains that aphanomyces protection is separate from standard seed treatments. “The seed treatment offers protection in the early stages,” Lang says. “Genetic protection bred into the seed kicks in later.” Having both the genetic protection and seed treatment may be a good idea if root rot is an issue in your area.
Much of the Upper Midwest had a wet fall in 2018, and Lang says this may create issues because alfalfa does not harden down as well in wet soils relative to normal or dry soils going into the winter. “It is one of many potential stress factors that can affect overwintering, so it’s complicated, but it is a significant factor,” he says.
“In general, by the time you are planting corn, it’s pretty obvious which alfalfa fields are OK and which did not survive well enough to keep,” he says. “Or wait until first-crop harvest to make the decision to keep or plant to corn. However, if you are trying to get a jump on the concern of overwintering, maybe trying to decide on interseeding a grass into injured areas of the field, or other options, then timing scouting stands in March could be helpful.”
With initial greenup, check for symmetrical growth of plants – uniform shoot development all around a plant versus growth from only half of a plant. Dig some plants, and check coloring in the crown; when yellow to brown is present, it indicates dying tissue. A creamy white color is healthy. A healthy crown root should be firm and not spongy.
If you choose to try to help a winter-damage field recover, allow the stand to reach a more mature stage before cutting, increase cutting height and fertilize adequately. ![]()
Kelli Boylen is a freelance writer based in northeast Iowa.


