Without the hay dog, the hay would push the twine out of the way of the twine fingers or tucker fingers, when the needles deliver the twine to the knotters, causing a mis-tied bale. Without operating hay dogs, the hay would also push forward in the bale chamber – interfering with the next charge of hay from the feeder, resulting in crooked bales.
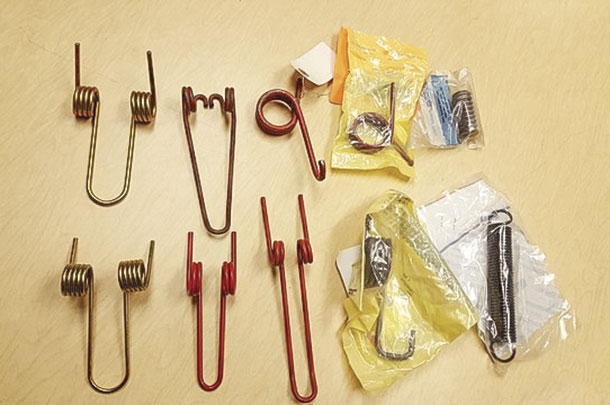
Hay dogs have come in a variety of shapes over the years, some working better than others. With the different styles of hay dogs, different variations of the springs required to operate the hay dogs have also been developed.
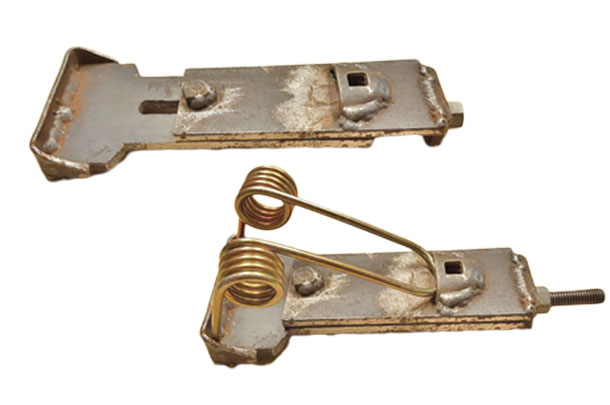
There have been compression springs, extension springs, springs with upturned legs and springs with downturned legs, single-coiled springs and dual-coiled springs. The springs in the photo cover many decades of baler production.
The hay dog itself has evolved over the years to one that protrudes farther into the bale case so the hay dog has more surface contact with the bale. The added contact area offers a more positive retention of the bale being formed.
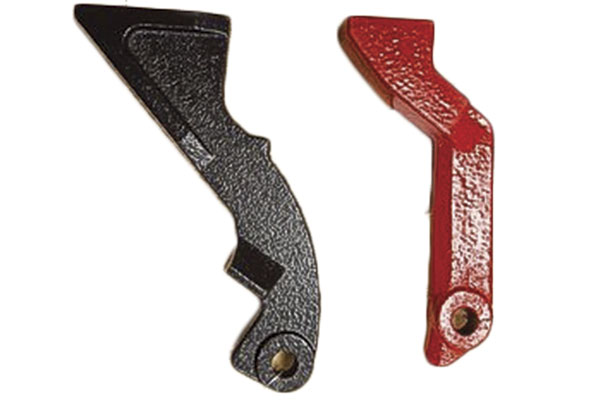
In addition to larger hay dogs, the number of hay dogs has also changed over the years. In the 1950s and 1960s, it was common to only use three hay dogs. Two hay dogs would be on top of the bale case, and one hay dog would be in the bottom center of the bale case. As baler design progressed, so did the number of hay dogs, until now we have six hay dogs retaining the bale in the bale case.
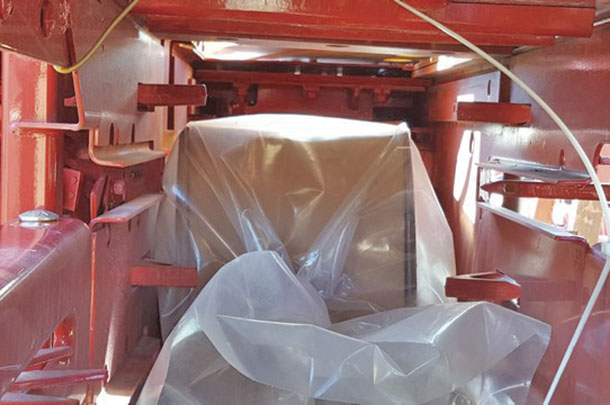
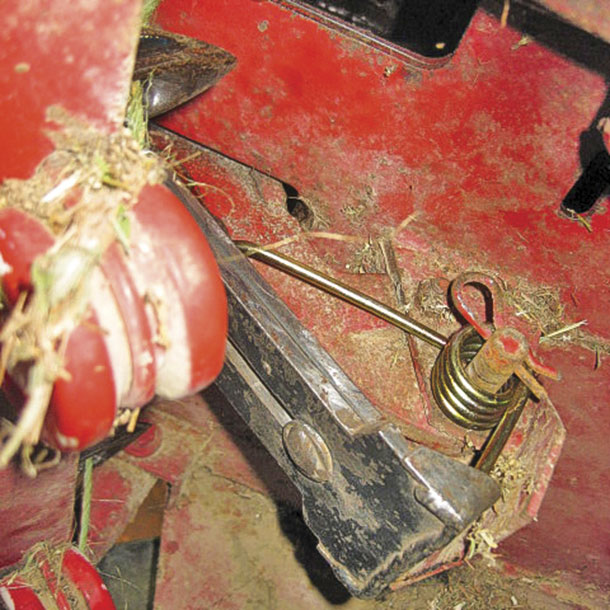
This photo shows the amount of hay dog penetration into the bale case. Four of the six hay dogs are visible.
A larger hay dog does little good if the hay dog cannot fully enter the bale case. With many balers having plunger strokes in excess of 90 strokes per minute, the hay dog has little time to re-enter the bale case once the face of the plunger passes to the rear.
To ensure the hay dog does fully re-enter the bale case, stronger and heavier hay dog springs have been installed. The springs have enough tension to quickly push the hay dogs fully into the chamber.
The hay dogs on modern balers work great, but it does come at a price. At some point, a spring will break and will need to be replaced. The heavier high-tension springs can be a problem to replace. Compressing a spring for installation can be very difficult and seem next to impossible to mount.
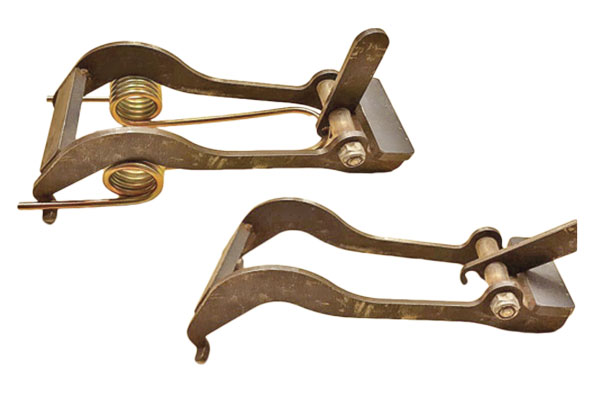
If there ever was a situation where a tool was needed to make a job easier, this is the one. I have two tools to mount the newer hay dog springs. One installs springs that have the legs pointing down, and the other tool installs springs that have the legs pointing upward. Each tool makes the job quick and easy.
One tool is factory-made and was offered by a baler manufacturer. The other tool I made because no tool is available for the job. The factory-made tool installs springs with the legs pointing down. If your baler uses this type of spring, you can fabricate the tool to fit your springs.
When using any tool, wear your safety glasses and any other safety equipment as needed. Practice safety first.
Instead of fighting the spring while holding the hay dog with one hand and pushing the retaining pin with the other hand, the tool holds the spring in a position that allows the hay dog retaining pin to be easily installed. Once the pin is installed, the lever will release the spring and the tool can be removed.
The second tool, which I made, compresses springs where the legs are facing up. Again, the tool can be modified to fit your situation.
The tool consists of two plates which slide together, compressing the spring as the nut is tightened.
With the spring compressed, the hay dog mounting pin easily slides into position. To remove the tool, pull the tool away from the legs of the spring.
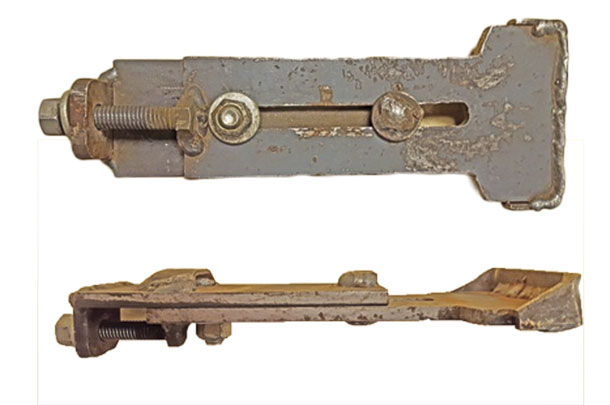
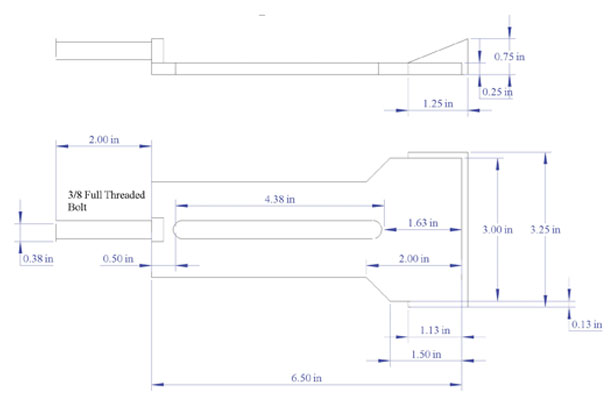
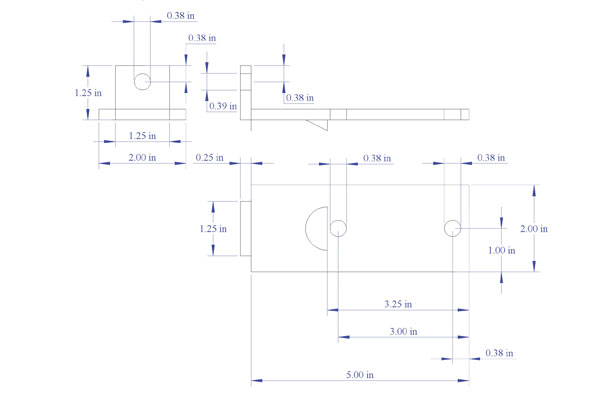
These are photos of the tool. Rough drawings are below. If you would like to make a tool like this or a similar tool to match the springs used on your baler. ![]()
Mike Seckinger has over 44 years of experience as a farm equipment mechanic in southern Indiana, and says, “What I write is not intended to represent the only way to solve a problem, and it may not always be complete.
If you choose to follow some of my procedures, remember to always practice safety first. Wear the correct clothing and safety equipment and use the equipment’s safety devices.”