And then there are days … you don’t. Like the day the knife arm needs repair. But maybe it’s not as tricky as you think. The following instructions will cover general repair of the knife arm on the New Holland small square baler, but the general procedure is applicable to other brands as well. (All photos were taken from a 1977 315 baler.)
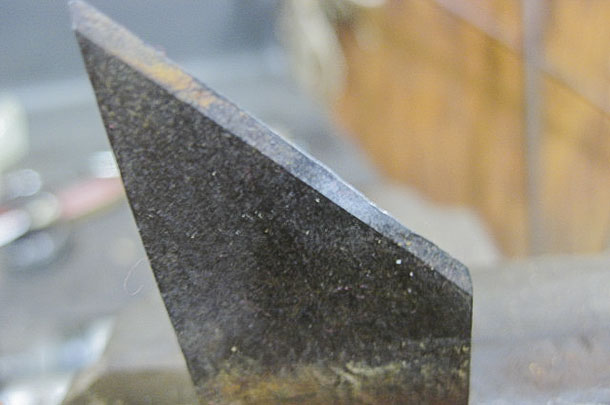
1. The knife on the knife arm cuts the twine in one spot. You can see in the photo the bright spot on the knife and the dip in the edge. The wear area is in the corner, where the reinforcing plate meets the knife. This is the spot you need to check to see if the knife is sharp. The rest of the knife can be sharp and still not cut the twine.
I have watched the twine climb the knife and not cut when the flywheel was turned by hand.
Once the riveted knife is replaced, it is easy to unbolt the knife and replace it. You can replace the bolted knife without removing the knife arm.

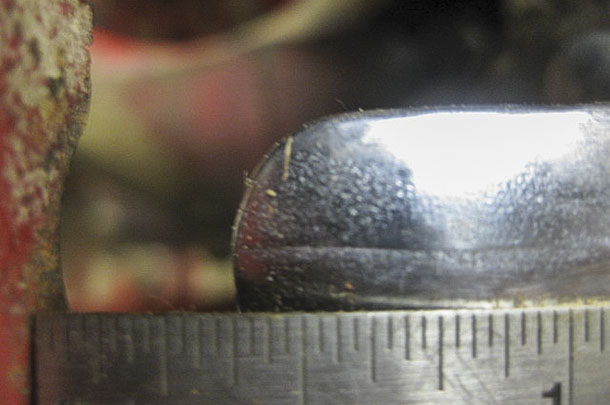
2. The other area that needs attention is the brass roller. Since the early ’70s, the roller has been retained by a hex socket screw. The screw can be hard to loosen. Grip the washer below the screw with a vice grip and turn in the direction that would loosen the screw. This breaks the screw loose so it can be easily removed.
On older balers, the roller was retained by peening the end of the knife arm. Take a flat file and remove the metal from the peening process. Once you have the right diameter, the washer can be pried off and the roller replaced. Then install the washer and peen the end.
There are days when you walk out the door ... smell the freshly cut hay, head for the baler and think, “Man, I love my job.”
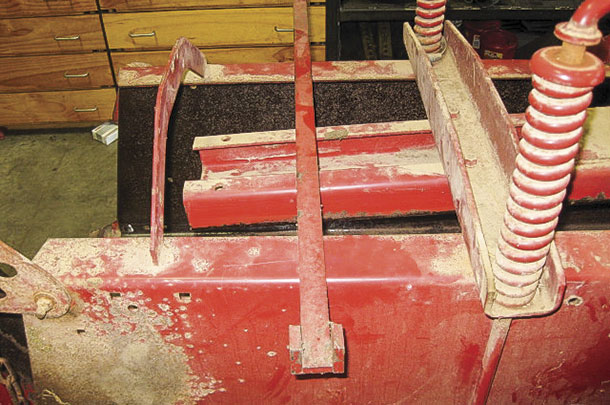
3. As you rotate the knotter frame upward, the knife arm will sweep across the billhook. The knife arm must rub against the billhook to remove the knot. It does not have to rub hard. With the knife arm contacting the billhook, you should be able to move the knife arm back and forth across the billhook by hand. If the knife arm does not rub the billhook, then take a hammer and hit the knife arm to bend the arm down.
If you go too far, then take a large screwdriver or pry bar and pry the knife arm up using the billhook as the fulcrum.
The next step is to check the throw of the knife arm. As you rotate the knotter up, the knife arm sweeps over the billhook. Stop when the knife arm is at its farthest travel point. Push the knife arm back toward the billhook to remove the excess movement. At this point, the distance between the knife arm and the billhook should be 3/8-inch.
4. This is a tool from New Holland to bend the knife arm. The two small vertical legs fit around the knife arm. Once in place, just pull or push. If you need more travel, hook the tool on the knife arm and pull. When you pull the knife arm, the knife arm will no longer rub on the billhook.
Hit the knife arm to bend the knife arm down until the knife arm rubs on the billhook again. Check the knife arm travel. Repeat as needed to get the right distance – at one time, the recommended distance was 3/8 to a half-inch. At a half-inch, the billhook tongue can contact the rubbing surface of the knife arm and cut a groove in the knife arm. I have not seen where this caused knot failure, but it is possible that the rough surface could damage the twine in the knot.
Happy haying. There’s always tomorrow … ![]()
PHOTOS: Photos provided by Mike Seckinger
Mike Seckinger has over 44 years of experience as a farm equipment mechanic in southern Indiana and says, “What I write is not intended to represent the only way to solve a problem and it may not always be complete. If you choose to follow some of my procedures, remember to always practice safety first. Wear the correct clothing and safety equipment and use the equipment’s safety devices.”